Installer Guide – How to Convert a Windmill to Solar Pump
Windmills can be a beautiful piece of work, in more ways than one. Replacing leathers is a hassle, the wind is often infrequent, and yields in terms of GPM are normally on the lower end. At the same time, a lot of ranchers have a sentimental feeling toward their old windmills, which we understand. We enjoy walking folks through the process of swapping out a windmill for a solar pump, and are quick to say that you don’t need to get rid of that windmill tower if you like it! Let’s chat through the Do’s and Don’ts of this swap real quick.
Do: Check your Well Casing Diameter
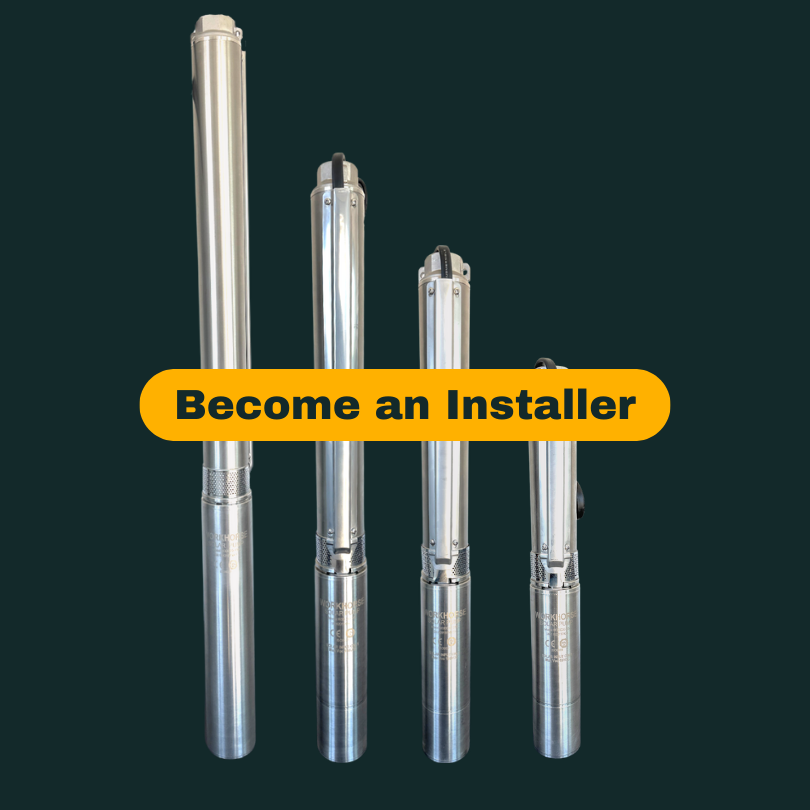
Our first thought is, why mess with anything if you don’t have to? Our smallest pump, the W2H-5-200, has an Outer Diameter of 2.01”. With a max head of about 200’, and a max GPM of 5, (see the name above) we find that this little guy is more than enough pump for many of our installers’ clients. If you can measure the amount of room you have to work with, you might find that this pump can fit cleanly between the well casing and windmill piping/sucker rod. To estimate this, I’ve had customers see if they can push a piece of Schedule 40 2” PVC into the well, to make sure there are no tight gaps where the pump would get stuck. If that’s a little too adventurous for you though, move on to your next ‘Do’
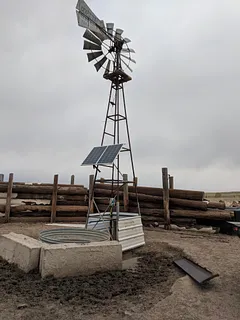
Figure 1: Solar Well Pump with Windmill Install
Do: Pull well piping and sucker rod
You will need some big wrenches. Besides that, the process is fairly simple, albeit cumbersome. Depending on how old the material is, it may be easier to pull out in pieces, especially if you don’t have a boom truck.
Don’t: Drop your windmill equipment
Again, fairly straightforward, but you may be surprised to hear how many folks end up doing this. This would be a reason why you may want to take out the material in pieces. Hoist, hold tight, and cut a 5-10’ segment at a time. You don’t want to spend a couple of hours trying to fish the windmill material out of the well.
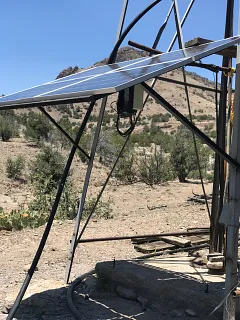
Figure 2: Solar Well Pump with Windmill Install
Do: Have some knowledge of solar pumps
If you haven’t already, go ahead and check through some of the key differences between a solar pump installation versus a standard AC installation. In general solar pumps are not particularly difficult to install, but make sure you’ve read through your manual if you haven’t installed a WORKHORSE pump before. Everything is straightforward, but knowing what angle to tilt the panels at and how to wire your controller is important. Besides that, piping and wiring from pump to well head should be the same as any standard well pump.
Don’t: Take down your windmill
Unless your client wants this done, it’s more trouble than it’s worth. We’ve had plenty of installers utilize the tower as a structure for mounting the solar panels and many feel it is a nice aesthetic touch. Since both pumping mechanisms (solar and wind) are off-grid, we think there’s some poetic justice to having those towers remain a functional part of the water system. You’ll see in these photos some of the different ways our installers have gone about mounting the panels.
Figure 3: Solar Well Pump with Windmill Install

If you’re just getting into the solar pumping space and want to learn more, we’d love to hear from you! If you’re a veteran installer who’s tired of trying to get support from big European companies, we can help! WORKHORSE is the premier USA-based solar pump manufacturer for professional installers, selling high-quality products at wholesale pricing. Our systems are only available through our Certified Installer network, so if you have questions or want to apply, call or text us at 916-623-4621, or email us at support@workhorsepumps.com. Our engineers handle pre- and post-sales support, and we’ll never leave you out dry. We hope to hear from you soon if it’s regarding a windmill-to-solar conversion you have questions about, or anything else solar pump related!