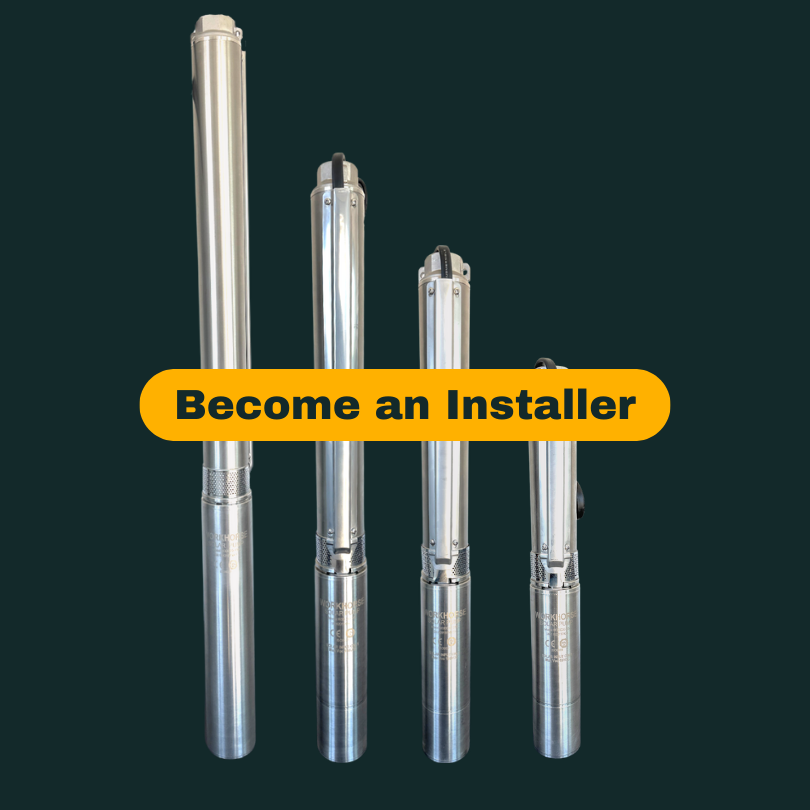
Solar Water Pump Installation Process for Professionals
If you’re a professional solar pump installer, you need products that are straightforward, high-quality, and reliable. That includes a plain-sailing installation process. Solar Pump Installation at WORKHORSE involves a couple of key steps that will be different from a standard AC pump install.
1. Wiring to Solar Panels
The obvious key difference between solar pumps and AC pumps is the primary power source. With solar pumps, we utilize an array of solar panels to supply power to the pump’s permanent magnet, brushless DC motor. This panel array is connected either directly to the DC motor or first to a surface controller. WORKHORSE includes solar wire with pre-crimped, easy to use MC4 connectors in all of our systems, as well as a DC cutoff to serve as a master on/off switch. The majority of our systems can operate without a surface controller (such as our Solar+AC Series and Direct Drive Series), but for some installations a pump controller can be desirable. These controllers enable the connection of pressure switches, tank floats, or water level sensors, and for some models they enable wiring of backup 110V/220 VAC power.
Figure 1: Wiring Options for Solar+AC series

2. Ensuring Appropriate Tilt Angle / Mounting Installation
The tilt angle of your solar array is an important factor that can impact system performance. WORKHORSE supplies adjustable-tilt panel mounting solutions with our pump systems, allowing installers and end users to change tilt angles manually on a seasonal basis, ensuring maximum solar power is collected. The ideal tilt angle can be found in the diagram below, based on U.S. latitude. Panel racks should be mounted away from any potential shade and oriented to face South to slightly Southwest. WORKHORSE recommends using Schedule 40 steel pipe to mount our adjustable-tilt panel racks (2-3/8”/ 4-1/2” OD depending on mount type).
Figure 2: Optimal Tilt Angles at Select Latitudes

3. Keeping in mind Solar VDC input ranges
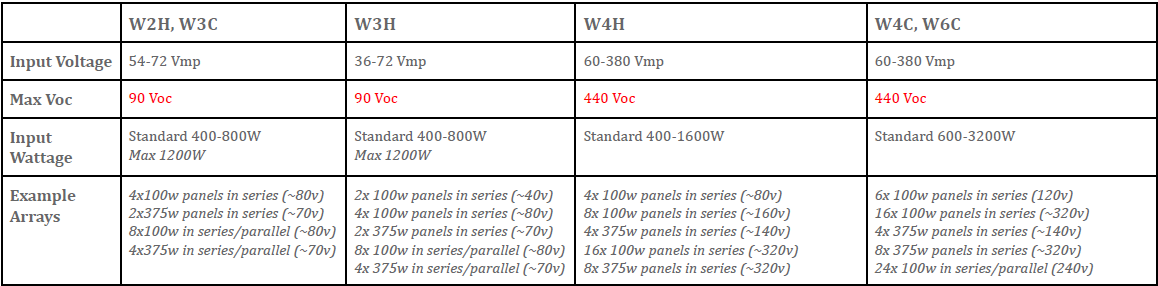
Our pumps are designed to handle a range of DC input voltages, and we offer complete, pre-configured systems with the appropriate type and quantity of solar panels to meet your performance needs. Compatibility with a range of input voltages allows our systems to be scalable (add more panels later to increase flow/pressure) and it can be helpful if using existing panels or supplying your own. In these cases, key values to look at are power rating (Watts) and max VOC (Open Circuit Voltage), which is additive if your panels are wired in series. Our Solar+AC Series, for example, has a maximum VOC of 440, whereas the Narrow Series has a maximum VOC of 90.
Figure 3: WORKHORSE Solar Pump Power Requirements
Solar panel selection is not always so cut-and-dry, and the previous examples only cover some use cases for our pumps. What if you want to wire batteries or a pressure switch? We also have that covered, so if you have further questions about our pumps or are interested in applying to be a professional installer, we would love to chat. We’re easily accessible via text or call at 916-623-4621 or email at support@workhorsepumps.com. Our technicians are USA-based, knowledgeable, and easy to speak with over the phone. We’d love to grow with you if you’re an aspiring solar pump installer! We hope to hear from you soon.